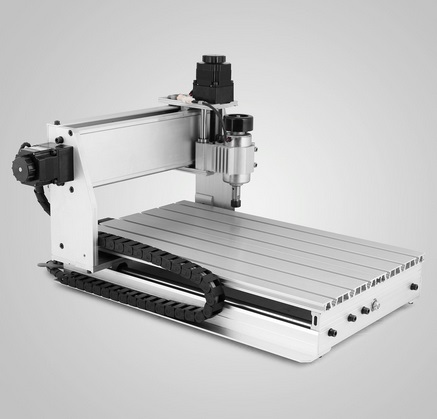
CNC Z-Probe and Touch Probe Guide
You're staring at your router bit hovering over the work surface. Your fingers are sweating. Is it 0.1mm away? 0.5mm? You jog down carefully, listening for the bit to scratch the surface. Then you hold your breath and try to zero the Z axis at exactly the moment it touches. One wrong micro-jog and y
Table of Contents
- The Real Problem: Z-Zeroing Takes Forever, and It's Ruining Your Cuts
- How Z-Probes Actually Work
- Four Types of Z-Probes (And What They Cost)
- DIY Probe: Build One Right Now
- GRBL Probe Configuration and Macros
- Using gSender and UGS Probe Wizards
- Block Thickness Compensation
- 3-Axis Probing Workflow
- The Tool Length Offset Problem (And Why It Matters)
- Comparison: Probe Types
- Common GRBL Wiring and Pinout
- Real-World Advice from the Community
- Verdict: Block Probe, Then Expand
- Parts for this guide
- Related Guides
The Real Problem: Z-Zeroing Takes Forever, and It's Ruining Your Cuts
You're staring at your router bit hovering over the work surface. Your fingers are sweating. Is it 0.1mm away? 0.5mm? You jog down carefully, listening for the bit to scratch the surface. Then you hold your breath and try to zero the Z axis at exactly the moment it touches. One wrong micro-jog and you've either crashed the bit or started 1mm too high—and your entire first pass is wasted.
That workflow is from 2005.
A conductive touch plate automates contact detection so the sender can set work Z from the plate's measured thickness. It can make zeroing easier and more repeatable, but setup, electrical checks and correct settings still matter. A single Z touch-off does not automatically map or level the whole surface.
You do not need an industrial probing system for a basic Z touch-off. A conductive plate, a tool clip and a compatible probe input can do that job. Stock Grbl includes probing commands, but the sender must turn the contact measurement into the intended work offset.
How Z-Probes Actually Work
A touch probe is just a switch. That's it.
With the spindle stopped and prevented from starting, the tool touches the conductive plate and closes the probe circuit. The controller records the contact position and stops the move. The sender then accounts for the plate thickness: if the measured plate is 15 mm thick, the tool tip is at work Z +15 mm on contact, with work Z zero at the stock surface below it.
After explicitly selecting G21, G91 and G94, a sender command such as G38.2 Z-10 F50 means the following. This is an example, not a universal travel or speed setting:
- Move Z downward (negative direction)
- Travel a maximum of 10mm
- At a feedrate of 50mm/min
- Record the contact position and stop the probing move; allow for the controller's stopping travel.
It's deliberate and slow because you want repeatable accuracy, not a violent impact.
Four Types of Z-Probes (And What They Cost)
Simple Block Probe: The Minimalist's Choice ($10–20)
Why it works:
- Aluminum conducts electricity, but the contact surfaces must stay clean, flat and free from damaging dents.
- Copper and brass also work as conductors, but they can tarnish; keep the contact surfaces clean.
- The block sits flat on your work surface and establishes a single, repeatable Z position
The gotcha: The clip needs reliable electrical contact with the stationary tool or collet. Do not rely on conductivity through spindle bearings or the housing. Keep the spindle stopped during probing, then remove the clip and plate before starting it.
Accuracy depends on plate thickness, cleanliness, contact detection and machine motion. Check repeated touch-offs against an independent reference.
3-Axis Touch Probe: Set X, Y, and Z from One Corner ($40–80)
This is an L-shaped conductive block (like a corner finder) that sits in the corner of your stock. When you jog the bit down and inward, you first touch one arm to set Y, then the other arm to set X, then the top to set Z. One probe, three axes.
Why it's worth the extra cost:
- One corner reference can simplify XYZ zeroing, provided block geometry and tool size are handled correctly.
- Speeds up repeat setups dramatically (if you're cutting 10 identical parts)
- Professional workflow
The tradeoff: You need clear access to a corner of your stock, and the probe itself takes up floor space.
Fixed Tool Length Setter: For Multi-Tool Runs ($60–150)
A fixed setter provides a repeatable contact location for comparing tools. After a tool change, a compatible routine probes the new tool and compares it with the stored reference, then updates the appropriate offset. Fixed mounting alone does not make that compensation automatic.
This solves the problem that every collet change moves your Z-zero. On single-bit jobs, you don't need it. On production runs with tool changes, it's a game-changer.
Industrial Wireless Probing Systems
Renishaw supplies industrial probes, and Haas offers integrated probing systems. These need the correct interface, controller support and calibration; price the complete system for the machine. A simple conductive plate is usually the more relevant starting point for basic hobby-router Z zeroing.
DIY Probe: Build One Right Now
Parts:
- A flat conductive block large enough for stable tool contact; measure its actual thickness rather than using nominal stock dimensions.
- Two separate lengths of flexible insulated wire suitable for the controller connector and repeated handling
- Wire ferrule connectors (optional but clean)
- Alligator clip and a male/female connector that matches your controller's probe input
Assembly:
- Provide one secure electrical connection to the block, outside the contact and seating faces.
- Secure the plate lead with a suitable screw terminal or connector and strain relief; verify continuity.
- Connect the separate ground lead to a clip for the stationary tool or collet; do not connect this lead to the block.
- Connect the block lead to the documented probe signal input, and the separate clip lead to controller ground.
Test with the spindle stopped: the sender must show the probe inactive when tool and plate are apart, then triggered when the actual tool touches the plate. Repeat the contact test before motion. If it stays triggered or never triggers, fix the wiring or configuration first.
GRBL Probe Configuration and Macros
Stock Grbl has probe detection built in. Before any probing motion, stop and disable the spindle, test the real contact circuit, and choose a travel limit that cannot cause a collision if contact fails. Confirm the plate thickness and the intended work coordinate system.
Key configuration ($):
- $6: On stock Grbl with its normal pull-up, 0 means a LOW input triggers probing and 1 inverts detection to HIGH. A passive normally-open plate usually uses 0. Check the actual board's input circuit and test both separated and touching states.
Use a sender such as gSender or UGS, not the CAD/CAM program Carbide Create. The example below demonstrates probing motion only: it uses millimeters and restores absolute distance mode. Use it only after checking the entire possible 10 mm path; use the sender's probing routine to calculate and set the work offset.
M5
G21
G94
G91 ; Relative mode, millimeters, units per minute
G38.2 Z-10 F50 ; Probe down, stop on contact
; No work offset is set here. Use a validated sender routine and the successful probe result.
G90 ; Back to absolute mode
Avoid a shortcut that relies on unknown modal state or layers G92 over an existing work offset. Use a probing routine that checks success, applies the measured geometry and retracts safely.
Using gSender and UGS Probe Wizards
Both gSender (my recommendation) and Universal Gcode Sender have built-in probe macros that automate this.
In gSender:
- Open Config, then Probe, and select the plate type and its settings.
- Enter your probe thickness (15mm or whatever your block is)
- Select Z probing, position the stationary tool as shown, and complete the conductivity check before selecting Start Probe.
- Watch the controlled touch-off and retract, then remove the plate and clip before cutting; a plain conductive plate does not make a mechanical switch click.
In UGS Platform, use the Probe module and configure the plate dimensions, probing travel, feed and retract for your setup.
Block Thickness Compensation
With the block sitting flat on the stock, the tool contacts the block's top above the stock surface. Enter the measured thickness so that work Z zero is at the stock, not at the plate's top.
Thickness compensation belongs in the probing routine: use the successful contact position and the measured plate thickness to set the intended work offset.
Tool length compensation is a separate operation.
Stock Grbl 1.1 supports dynamic tool length compensation with G43.1 and cancellation with G49. It does not provide a G43 H99 tool table or an M6 tool-change routine. Store plate geometry in the sender's probe settings; use a documented tool-change workflow for tool lengths.
3-Axis Probing Workflow
If you go with an L-shaped 3-axis probe, the workflow is:
- Probe Y: Approach a face perpendicular to Y, using the direction and starting position required by the plate's routine. A face parallel to Y cannot be located by moving along Y. Include the plate offset and tool radius when setting work Y.
- Probe X: Approach the other locating face in the correct direction, with clearance for the tool and clip. Let the routine apply the plate geometry and tool radius to the recorded contact position.
- Probe Z: Touch the top with the stationary tool, then apply the measured Z thickness and retract clear of the block.
The sender must apply the plate geometry and tool-size compensation before XYZ zero represents the stock corner. Moving the origin handles an off-center part; it does not correct rotated stock. Square the stock to the machine or use a separately supported rotation workflow.
Community note: CNC Zone and the Carbide 3D forums have excellent 3-axis probe diagrams. The V1 Engineering folks also have macro examples for popular controllers.
The Tool Length Offset Problem (And Why It Matters)
Every time you change a router bit, your Z zero shifts. The new bit might be 2mm shorter than the old one. If you're running a multi-tool job (roughing with a 1/4" end mill, finishing with a 1/8" end mill, engraving with a V-bit), you need to re-zero Z for each tool.
Solution: a fixed tool length setter.
Mount a conductive plate (or use the method above) at a fixed Z height on the side of your machine. When you change tools:
- Use the configured tool-change routine to probe the new tool at the fixed setter with the spindle stopped.
- The machine records the new Z position
- Compare the new setter contact position with the stored reference-tool contact, then apply the tool-length difference through the supported routine.
Tool-table support depends on the controller and sender. Mach3 has tool offsets, and current gSender includes tool-table features for compatible workflows, but stock Grbl does not automatically execute M6 or G43 H tool-table changes.
For GRBL machines: You'll use macros or work around it with manual offset math (not fun, but doable).
Comparison: Probe Types
| Probe Type | Cost | Setup Time | Accuracy | Best For | Downsides |
|---|---|---|---|---|---|
| Simple Block | $10–20 | Depends on positioning and probe settings | Verify the complete setup | Single Z-zero per job | Only handles Z |
| 3-Axis Corner Probe | $40–80 | Depends on the XYZ routine and access | Verify geometry and tool-size compensation | X/Y/Z from one reference | Needs corner access |
| Fixed Tool Length Setter | $60–150 | Depends on tool change and probing routine | Check setter repeatability and calibration | Multi-tool production | Requires fixed mounting |
| Commercial Wireless | Model-specific system quote | Depends on system and probing cycle | Use the named probe's specification and calibration | Professional shops | Overkill, expensive |
Common GRBL Wiring and Pinout
For stock Grbl on an Arduino Uno, a passive two-wire plate connects between A5 and GND. Other boards may use a different connector, pin assignment or input circuit, so use their documented pinout.
- Probe signal: A5 on the standard Grbl Uno pin map
- GND
- No supply wire is needed for a passive plate; powered probes require a separately verified compatible interface.
Connect your probe's return wire to the Probe pin and the ground clip to GND. When the two wires of your probe touch, the input goes LOW, and the probe cycle halts.
Verify the board schematic and test the actual tool-to-plate circuit. $6 changes which input state Grbl treats as contact; it does not change the physical voltage produced by the wiring or interface.
Real-World Advice from the Community
Practical checks before relying on a probe:
- Start simple. Build a block probe. Spend $20, test it, learn the workflow.
- Clean before probing. Dust on the probe surface kills accuracy. Wipe the work surface and the probe block with a dry cloth before every pass.
- Use the probe or sender manufacturer's recommended feed and verify repeatability and stopping travel. There is no universal 50 mm/min setting for every plate, switch and controller.
- Retract the tool clear of the plate before removing it. Remove the clip and plate before the spindle starts; a spring on the clip does not command an axis retract.
- Test on scrap. Run a test probe cycle on a sacrificial piece first, especially if you're unsure about contact.
Verdict: Block Probe, Then Expand
A simple conductive plate is a useful starting point for Z zeroing. Add a corner probe when XYZ setup warrants it, or a fixed setter when you have a compatible, calibrated tool-change workflow.
The learning curve is near-zero, the payoff is immediate, and you've eliminated one of the most nerve-wracking parts of CNC routing.
Parts for this guide
If you are buying after reading this, these are the specs to look for.
| Part | What to buy | Where to look |
|---|---|---|
| Passive Z touch plate and tool clip The simplest way to set work Z: a plate, a clip and the controller's probe input. | Flat conductive plate with measured thickness, separate plate-to-probe and tool-clip-to-ground leads, and a connector matching the controller; no powered output for a bare Uno A5 input. | |
| XYZ corner touch plate Finds X, Y and Z at a stock corner in one routine. | Conductive corner plate with documented X/Y offsets and Z thickness, a tool clip, and geometry explicitly supported by the chosen sender's probing routine; match the controller connector. | |
| Fixed tool setter Supports repeatable tool changes when paired with a calibrated reference and compatible software routine. | Mechanically mounted contact setter with documented repeatability, overtravel and contact logic; choose an unpowered dry-contact interface or a verified interface compatible with the controller input. | |
| Micrometer for plate-thickness measurement Supplies the actual compensation dimension instead of assuming nominal block thickness. | Flat-anvil micrometer with a range covering the plate thickness and stated accuracy suitable for the intended Z tolerance; measure clean seating and contact faces. |
"Search" buttons open a search for that exact spec, so compare listings against it before buying. Some links earn us a commission at no extra cost to you (disclosure).