CNC Limit Switches and Homing: Setup Types and Why They Matter
You can cut without homing. The machine will move, the spindle will spin, and parts will come out. Until something goes wrong and you have no idea where the tool actually is. Then you crash into a clamp. Then you ruin a $500 router bit.
Table of Contents
- The Most Skipped Step That Saves Your Machine
- What Homing Actually Does
- Homing vs Limit Switches: Same Hardware, Two Purposes
- The Hardware: Four Approaches
- Repeatability: What Actually Matters
- NC vs NO: Normally Closed vs Normally Open
- GRBL Homing Settings Reference
- Dual Endstops for Auto-Squaring
- Soft Limits: Your Safety Net
- Tool Probe as Soft Limit Alternative
- What We'd Buy
- Shop This Guide
- Homing Sequence Flowchart
- Related Reading
The Most Skipped Step That Saves Your Machine
You can cut without homing. The machine will move, the spindle will spin, and parts will come out. Until something goes wrong and you have no idea where the tool actually is. Then you crash into a clamp. Then you ruin a $500 router bit.
Limit switches establish a known reference point. Homing tells the machine "you are here." Everything else (work offsets, tool changes, power-loss recovery) depends on that one simple fact. Skip this step and you're flying blind.
This guide covers the hardware, the types, and how to actually use them with GRBL.
What Homing Actually Does
A homing sequence:
- Machine moves an axis toward a limit switch at slow speed
- Switch triggers; machine records that position as the machine's home coordinate (0,0,0 for all axes)
- Soft limits activate; the controller now prevents motion beyond that reference point
Without homing, your machine knows relative position (where it moved from its current location) but not absolute position (where it is in the physical world). If you home, lose power, and recover—the machine knows where it was. Without homing, everything after power loss is guesswork.
Homing vs Limit Switches: Same Hardware, Two Purposes
The same switch can serve dual purposes:
- Homing: Finding the machine's zero reference point
- Limit: Preventing over-travel by stopping motion before crashing
GRBL firmware uses the same endstop switches for both. When you home, the switch acts as the reference. When you're moving normally, the same switch acts as a hard limit—if you try to move past it, the machine stops.
The Hardware: Four Approaches
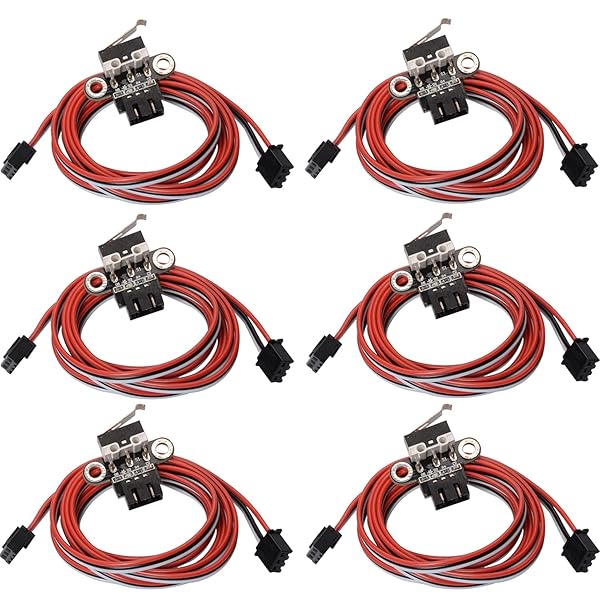
1. Mechanical Endstops (Microswitches)
A little lever-actuated switch. Most common in hobby CNC. You hit it with a moving block or flag, the switch closes/opens, the machine knows it's at a limit.
Advantages:
- Cheap: $2-5 per switch
- Reliable: proven technology, near-zero false positives
- No electronics needed: just wire to controller
- Repeatable: ~0.1-0.2mm consistency on repeated home cycles
- Robust: dust, coolant, sawdust don't affect them (unlike sensors)
Disadvantages:
- Physical contact required: the carriage has to move far enough to actually hit the switch
- Requires mechanical design: you need a actuator arm or flag
- Space constraints: takes up room to mount
Best for: 99% of hobby CNC machines. This is the safe, proven choice.
2. Optical Endstops
Light beam interrupted = signal. No mechanical contact.
Advantages:
- Non-contact: no wear
- Consistent: good repeatability if mounted carefully
- Fast response
- Can be very compact
Disadvantages:
- Slightly more expensive: $5-15 per sensor
- Requires careful alignment: a 1° misalignment breaks it
- Dust and moisture can affect light path
- Need power/signal wiring (not just two-wire switch)
Best for: Clean environments, very compact builds, retrofits where mechanical space is tight.
3. Inductive Proximity Sensors
Detects ferrous metal. No contact, no optics—just field detection.
Advantages:
- Immune to dust, sawdust, coolant: the metal target does the detecting
- Reliable: 100,000+ cycle lifespan
- Excellent repeatability: ±0.01-0.05mm (better than mechanical)
- Can be mounted behind non-metal surfaces
- Fast response
Disadvantages:
- More expensive: $8-20 per sensor
- Requires power supply (12V or 24V typical)
- Target must be ferrous steel or iron
- Slightly slower response than mechanical (milliseconds matter at high rapids)
Best for: Wet environments, dirty shops, machines running long hours where switch wear is a concern, production machines where tight repeatability is mandatory.
4. Hall Effect Sensors
Detects magnetic field. Mostly used for rotary axes.
Advantages:
- Non-contact, non-optical
- Reliable
- Small
Disadvantages:
- Overkill for linear CNC axes
- Less common in hobby setups
Skip this for linear axes. Save Hall sensors for rotary work.
Repeatability: What Actually Matters
A homing switch's repeatability is how close to the same position it stops each cycle. This is different from accuracy (how close to the true zero).
Mechanical endstop: ±0.1-0.2mm typical. Good enough for 99% of hobby work.
Optical endstop: ±0.05-0.1mm with careful alignment.
Inductive sensor: ±0.01-0.05mm. Excellent, but overkill unless you're doing tight-tolerance work.
Here's the practical truth: if your repeatability is 0.2mm and your cutting tolerance is 0.1mm, you have a problem. If your repeatability is 0.2mm and your tolerance is 1mm, you're fine. Know your requirements before upgrading.
NC vs NO: Normally Closed vs Normally Open
Switches come in two flavors:
NC (Normally Closed): Switch is "on" when not triggered, "off" when pressed.
- If the wire breaks → machine sees a limit trigger → machine stops
- Fail-safe: broken wire stops the machine, doesn't run away
NO (Normally Open): Switch is "off" when not triggered, "on" when pressed.
- If the wire breaks → machine doesn't know about the limit
- Dangerous: broken wire means lost limit detection
Always use NC switches. Period. This is basic safety.
GRBL Homing Settings Reference
GRBL uses these parameters ($word format):
```
$22 = 1 (Enable homing)
$23 = 0 (Homing direction; 0=negative, 1=positive)
$24 = 25 (Homing seek velocity, mm/min)
$25 = 500 (Homing feed velocity, mm/min)
$26 = 250 (Homing debounce, milliseconds)
$27 = 1.0 (Homing pull-off, mm)
```
What these mean:
- $22=1: Enable homing. If 0, homing commands are ignored.
- $23: Homing direction. 0 = home toward minimum (most common). 3 = reverse direction for all axes.
- $24: Fast search speed. Moves quickly until the switch is hit, then backs off. 25 mm/min is slow but safe for initial contact.
- $25: Fine approach speed. After hitting the switch and backing off, slowly approach again for repeatable position. 500 mm/min is typical.
- $26: Debounce time. Mechanical switches bounce—this waits 250ms to make sure the switch is truly triggered, not just vibrating.
- $27: Pull-off distance. After homing, back away from the switch this many mm. Prevents the carriage from binding against the switch.
Dual Endstops for Auto-Squaring
Here's an advanced technique: run separate limit switches on both Y motors (or both X, depending on your axis layout). Use GRBL's dual-axis feature to sync them during homing.
What this does: If one motor hits its limit before the other, that motor stops while the other continues until it hits its limit. Result: perfectly square gantry every home cycle.
Requirements:
- Separate limit switches on each motor (standard endstop wiring, just doubled)
- GRBL board with dual-axis support (custom GRBL firmware or compatible controller)
- Mechanical design that allows independent motor control
Huge advantage: Eliminates gantry racking that accumulates from week to week. Your machine stays square permanently.
Limitation: Requires controller support. Standard GRBL doesn't have this; you need custom firmware or a different controller (Mach3 does this natively).
Soft Limits: Your Safety Net
After homing, GRBL soft limits ($20=1) prevent motion beyond the homing point.
Move toward the limit? The controller stops you before you reach the physical switch. This is your safeguard against accidentally commanding the machine past its limit.
Enable soft limits always. They cost nothing and prevent crashes.
Tool Probe as Soft Limit Alternative
Some setups use a tool probe (Z-axis touch plate) to establish a known Z reference. Not a true limit, but it serves the same function: establishing absolute position.
Common workflow:
- Home X and Y to mechanical switches
- Manually move Z to a known height (top of material)
- Probe the tool against the material
- Set work offset from there
This is a valid approach if your mechanical Z limit is inconvenient or if you need sub-mm Z accuracy. But it requires operator discipline—you have to probe before every job.
Mechanical Z limits are simpler and more reliable.
What We'd Buy
For a new build: Mechanical NC (normally closed) limit switches with good lever arms to ensure positive contact. Budget $15-20 for a complete 3-axis set.
For tight-tolerance production: Inductive proximity sensors if your budget allows. ~$40 total for three axes, better repeatability.
For retrofits: Whatever fits your existing frame geometry. Mechanical is almost always the easiest retrofit.
Shop This Guide
| Product | Link | Notes |
|---|---|---|
| Mechanical Endstop Kit | CNC Endstop Mechanical Limit Switch Kit on Amazon → | 3-5 switches with mounting brackets. Standard choice. |
| Inductive Proximity Sensor | Inductive Proximity Sensor NPN NC CNC on Amazon → | Better repeatability. ~$8-15 each. Plan 3 per machine. |
| Limit Switch + Drag Chain Bundle | CNC Limit Switch and Drag Chain Bundle on AliExpress → | Cheaper if buying a complete kit. Quality varies. |